
Roughly 45% of household waste is compostable, yet a significant portion of it often finds its way to landfills. When kitchen scraps and organic waste end up in landfills, they undergo anaerobic decomposition, producing methane, a potent greenhouse gas. In contrast, choosing to compost these materials not only diverts waste from landfills but also transforms it into a valuable resource for your garden.
Worm farming for beginners explains how composting is a sustainable practice that allows you to recycle kitchen waste and create nutrient-rich compost, often referred to as “black gold.” This compost acts as a powerful fertilizer, enhancing soil health and promoting plant growth. By understanding the basics of worm farming or vermicomposting, you can actively contribute to reducing your environmental footprint while reaping the benefits of a thriving garden.
Getting Started with Worm Farming
When diving into worm farming, the first step is selecting the right worms. While Red Wigglers are commonly used in vermicomposting, Tiger worms (Eisenia fetida) are another excellent choice. Both species are voracious eaters, breaking down organic matter efficiently.
You can typically find these worms at your local garden center, often sold by weight (e.g., 500 grams or 1 pound) as a convenient starting amount for beginners.
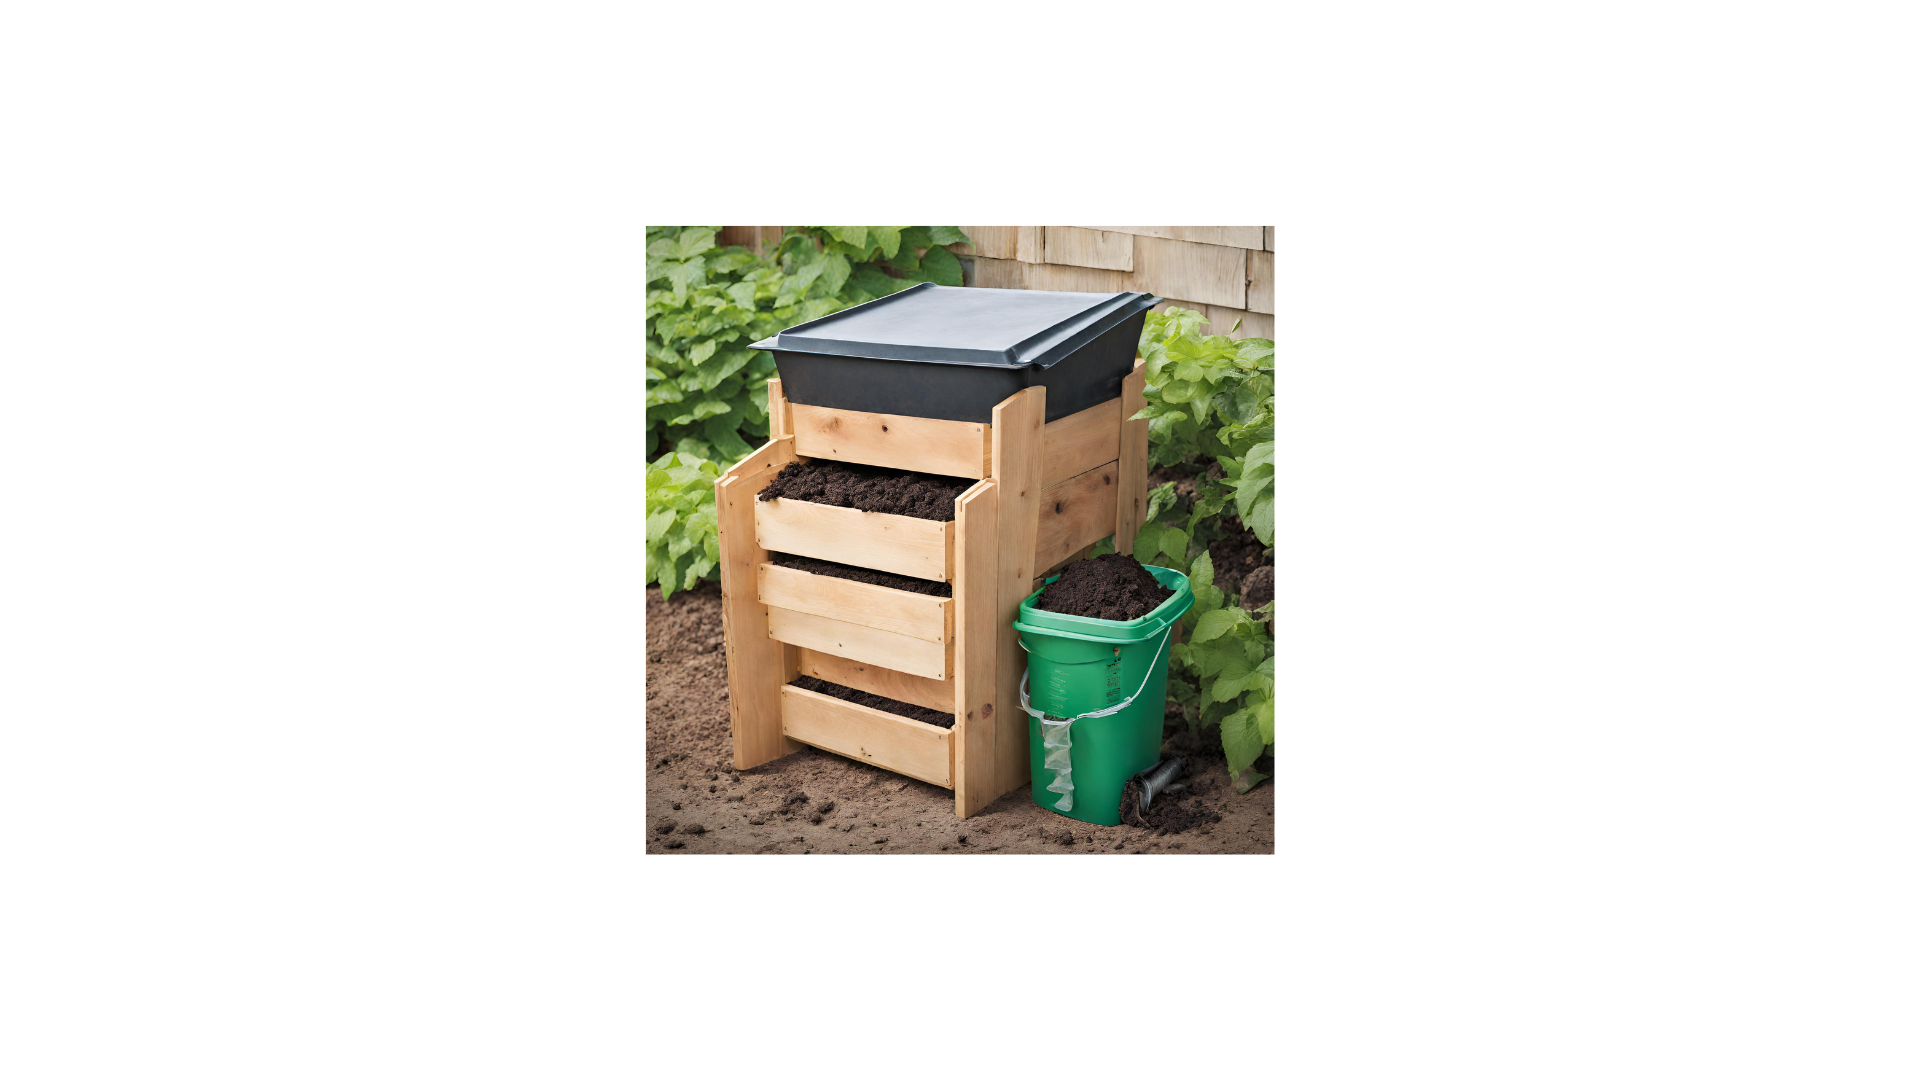
Now, let’s talk about worm bins. There are two main types to consider: the stacked worm farm and the continuous flow barrel.
- Stacked Worm Farm:
-
- Layers of trays are stacked on top of each other.
- Features a tap or outlet at the bottom for collecting nutrient-rich worm tea.
- Easy to manage and suitable for beginners.
- Continuous Flow Barrel:
-
- A large container with holes for drainage and air circulation.
- Worm tea drains continuously through the system.
- Provides efficient aeration but might have a steeper learning curve.
When setting up your worm farm, creating a suitable environment for your worms is key. This includes providing the right bedding for them to live and thrive. Worm bedding serves as the habitat for your worms and the starting material for the composting process.

Worm Bedding:
- A mixture of potting mix, soil, hay, dead leaves, and shredded cardboard makes ideal bedding for your worms.
- This combination provides the necessary structure, aeration, and carbon sources for the composting process.
- Ensure the bedding is moist but not waterlogged, creating a comfortable and conducive living space for the worms.
It’s important to note that each worm farm may have specific guidelines for the level of bedding required. Beginners should carefully follow the instructions provided with their worm farm, as it will often indicate the appropriate depth or mark for the bedding. This ensures that the worms have the right conditions to thrive and effectively process your kitchen waste.
Remember, a well-prepared and moist bedding sets the stage for a successful worm farm.
Feeding Your Worms:
Worms are voracious eaters but providing them with the right diet is crucial for a successful vermicomposting experience. Aim for a balanced ratio of approximately 70% green waste to 30% brown waste.
Green Waste (70%):
- Fruit and vegetable scraps
- Coffee grounds
- Tea bags (make sure they are compostable)
- Crushed eggshells
Brown Waste (30%):
- Torn-up paper or cardboard
- Dry leaves
Remember to keep all food scraps, regardless of type, in small pieces—ideally smaller than a golf ball. This allows the worms to break down the material more efficiently.
Avoid Putting the Following in Your Worm Farm:
- Spicy foods (e.g., chili, onions)
- Meat and meat products
- Dairy products
- Bread and other processed foods
- Citrus fruits
- Oils and liquids (e.g., soups)
By following these guidelines, you’ll maintain a healthy and productive worm farm. The exclusion of certain items helps prevent unpleasant odors and keeps the environment suitable for your worm community.
Maintaining Your Worm Farm:
Keeping a healthy environment for your worms involves regular maintenance to ensure optimal conditions for the composting process.
Preventing Compaction and Maintaining Moisture:
- Avoid Compaction: The composting process can become compacted, hindering the worms’ ability to move and aerate the bedding. To prevent compaction, avoid overloading the bin and regularly turn the contents.
- Moisture Levels: It’s essential to maintain the right moisture levels in the worm bedding. Too dry, and the worms may struggle; too wet, and it can lead to unpleasant odors. Covering food scraps with moist cardboard or a piece of damp carpet helps create a dark, moist environment for the worms to work on breaking down the waste.
Aerating the Worm Bin:
While there are tools available for aerating the worm bin, consider using your hands (wearing gloves) for a more hands-on approach. Gently turning the contents allows you to feel the texture of the bedding and ensures you won’t accidentally harm the worms with a tool.
Protect Yourself:
- Consider wearing a mask when working with the worm farm to avoid inhaling any potential spores from the soil. This simple precaution helps ensure a safe and enjoyable vermicomposting experience.
By actively maintaining your worm farm, you’ll foster a thriving environment for the worms, leading to nutrient-rich compost for your garden.

Harvesting and Using Worm Castings:
As your worm farm thrives, you’ll be rewarded with two valuable byproducts—worm castings and worm tea. These nutrient-rich materials are gold for your garden.
Worm Castings:
- Worm castings resemble fine potting mix and are a concentrated source of organic nutrients.
- Harvest the castings by gently scooping them out from the bottom layer of the worm farm where there are very few worms.
- Mix the castings with soil or potting mix for your next round of planting seeds or seedlings. Alternatively, blend them with existing soil to enhance its quality.
Worm Tea:
- Worm tea, a liquid runoff from the bottom of the worm farm, looks similar to black tea.
- Dilute worm tea before use, mixing it at a ratio of 1 part tea to 10 parts water.
- Use the diluted worm tea as a powerful and natural fertilizer for all plants. It’s especially beneficial for herbs and vegetables, whether they’re in pots or planted in the ground.
By incorporating worm castings and tea into your gardening routine, you’ll promote healthier plants and improve the overall vitality of your garden soil.
Troubleshooting Common Issues:
Even with the best intentions, beginners may encounter a few challenges when managing a worm farm. Here are some common issues and their solutions:
1. Rotting Food in the Worm Farm:
· Cause: Too much food was added.
· Solution: Feed less until the worm population increases, allowing them to catch up with the amount of waste.
2. Fruit Vinegar Flies or Small White Bugs:
· Cause: The environment is too acidic.
· Solution: Cover food with damp paper, add lime from the local garden center to increase pH, and ensure a balanced environment.
3. Worms Climbing Up the Side:
· Cause: The environment is too wet.
· Solution: Keep the worm farm out of the rain and address excess tea in the bottom by draining it and adding paper or cardboard and dry leaves to absorb moisture.
4. Ants in the mixture:
· Cause: The mixture is too dry or acidic.
· Solution: Add water and lime to balance acidity; use containers of water under the worm farm legs to prevent ant entry.
5. Food Not Eaten:
· Cause: Food pieces are too large.
· Solution: Ensure all food scraps are smaller than a golf ball in size for efficient breakdown by the worms.
6. No Worm Tea:
· Cause: Insufficient moisture.
· Solution: Add more water to encourage the production of nutrient-rich worm tea.
By identifying and addressing these issues promptly, you’ll maintain a healthy and thriving worm farm. If problems persist, don’t hesitate to reach out for additional guidance or consult local resources for personalized assistance. For more in depth information and guidance click here
